
|
I am so excited to share my latest creation, the Bloody Scarf! This was my first commission piece, requested by the guitarist for the band I'm Alive. He wanted a scarf that looked like his throat had been ripped open and was covered in his blood. I am planning on recreating this as a tutorial in the near future, but for the time being I've thrown together a walk-through of how this was constructed. Getting started...Materials:
I made this in three main sections: two red ends to simulate blood dripping into pools, and a black middle section with splattered with red. I began with the red end pieces using the Holly Berry (although in the future I will do those last, to help control the length of the scarf.), and crocheting vertically (long rows up and down the length of the scarf) using a half double (HDC) stitch. When I wanted to create a drip I would pick a starting point and switch from an HDC to a Chain stitch. When I had chained the desired length of my drip I would turn and continue with the HDC stitch to the end, as depicted below. 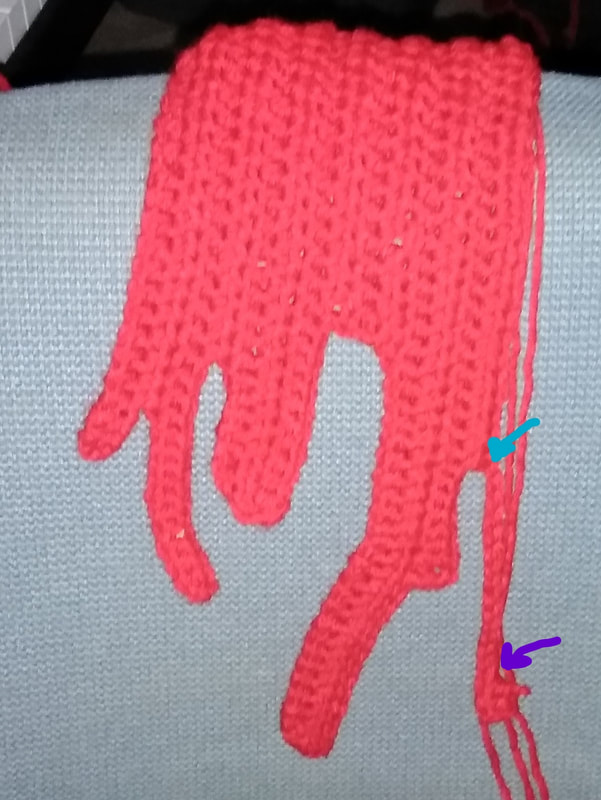 I am creating a new drip by switching from an HDC to a chain stitch, turning when I reached the desired length, and then using a HDC to the end. After I made the scarfs drippy ends I began making bloody drips and splotches. I just combined stitches and stuck my hook wherever necessary to get weird splotchy shapes. The main section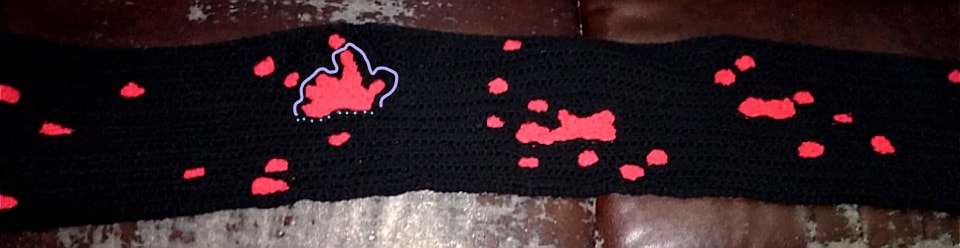 I worked the main section vertically in the HDC stitch, just as I did with the end pieces, only using black yarn this time. I made the same drips on the ends that I did for the two end pieces, being careful to match them up so that I could sew them together like pieces of a puzzle. I sewed the drips and splotches in one side at a time, (shown by the teal dotted line in the above photo) leaving a long tail. Then I switched from a HDC to a Chain stitch, creating a chain just long enough to wrap around your blood splotch, (shown by the purple solid line in the above photo.), then I would continue HDC-ing. After I turn and come back to my blood splotch I would use whatever smaller stitch was best suited to even my row out. It often took more than one turn to even things out. Then I used the long ends I had left to finish sewing the splotches in. CompletionAfter I had my pieces completed and sewn together I did a simple slip stitch border around the entire scarf, throwing in a Single Crochet or Half Double Crochet stitch to even things out if necessary. This was just to make sure that the edges looked nice, and make sure it was even. Ta da! 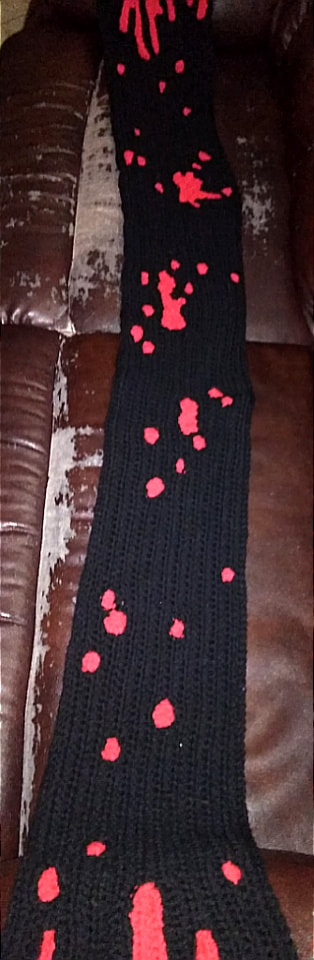
0 Comments
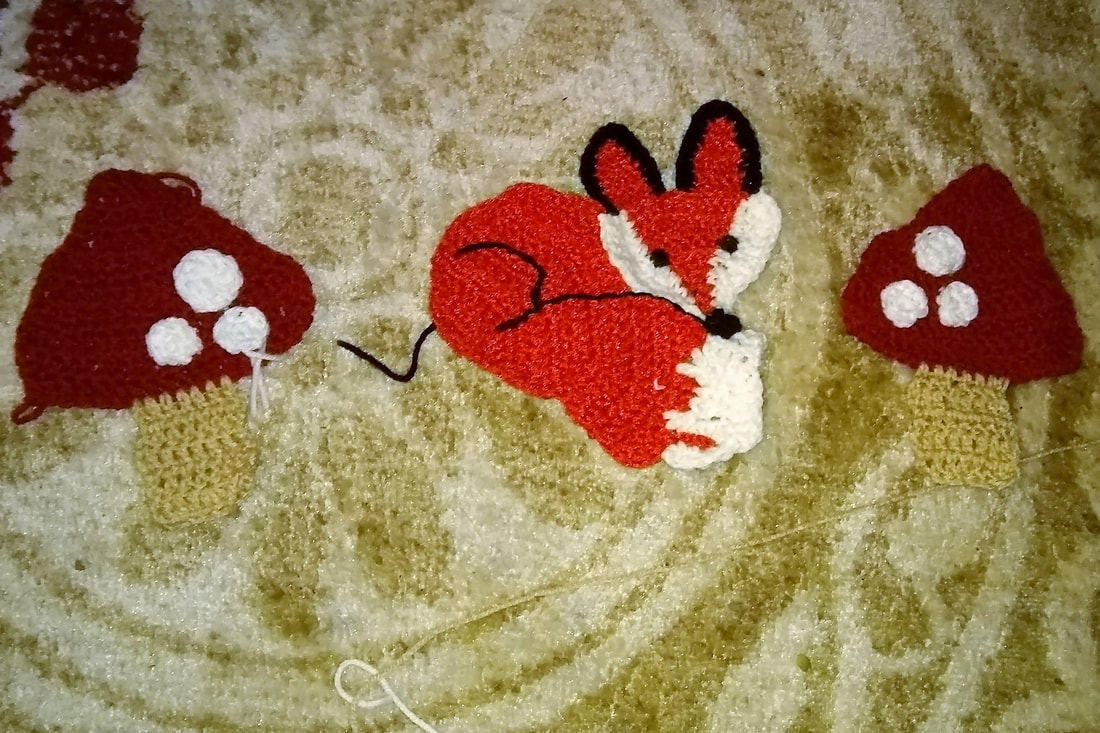
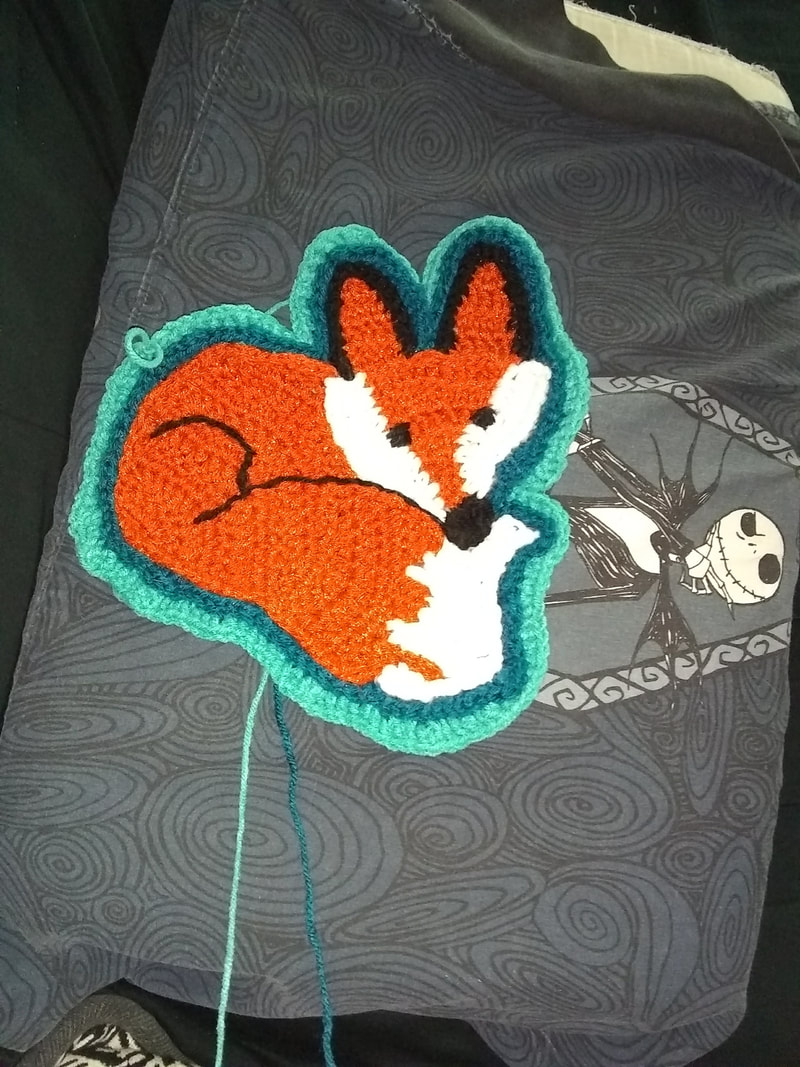
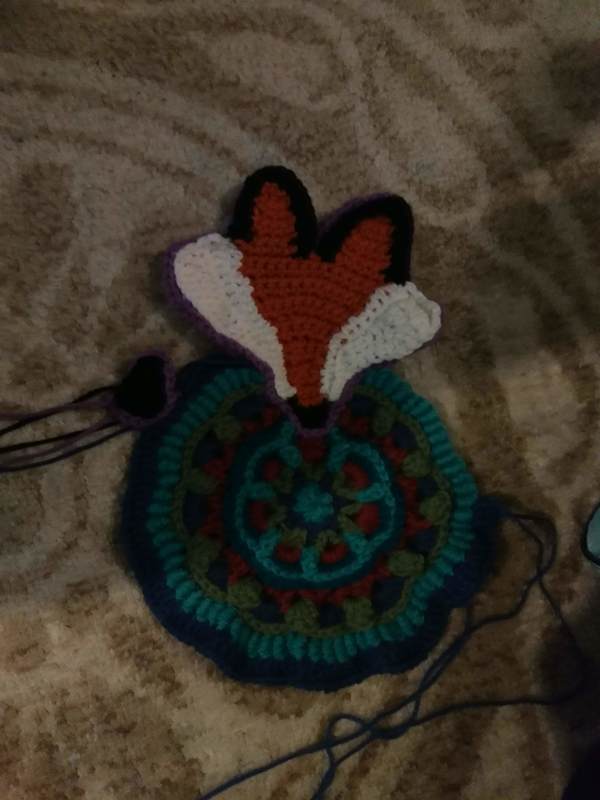
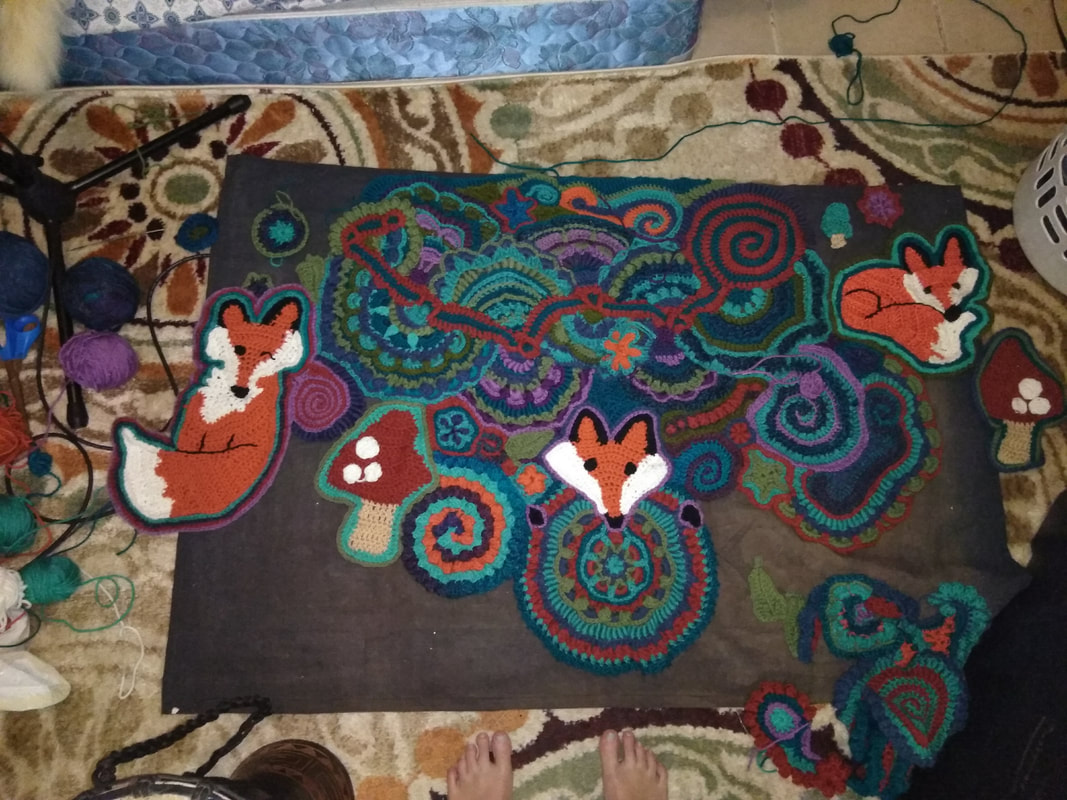
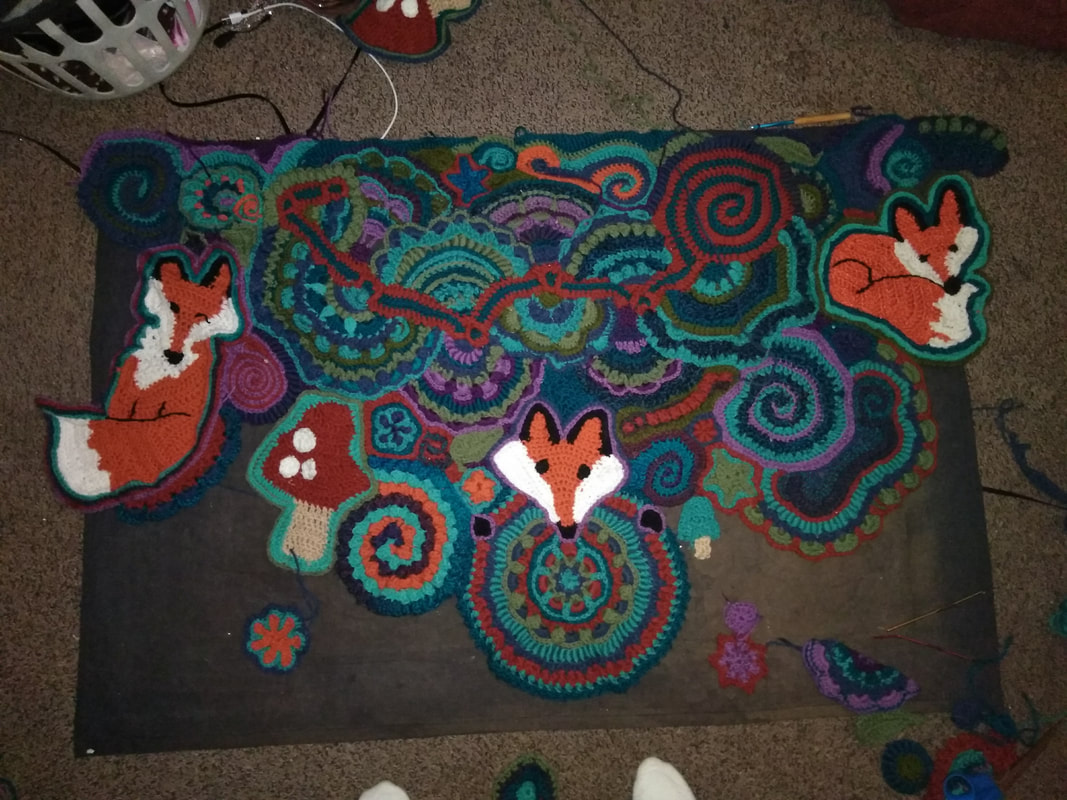
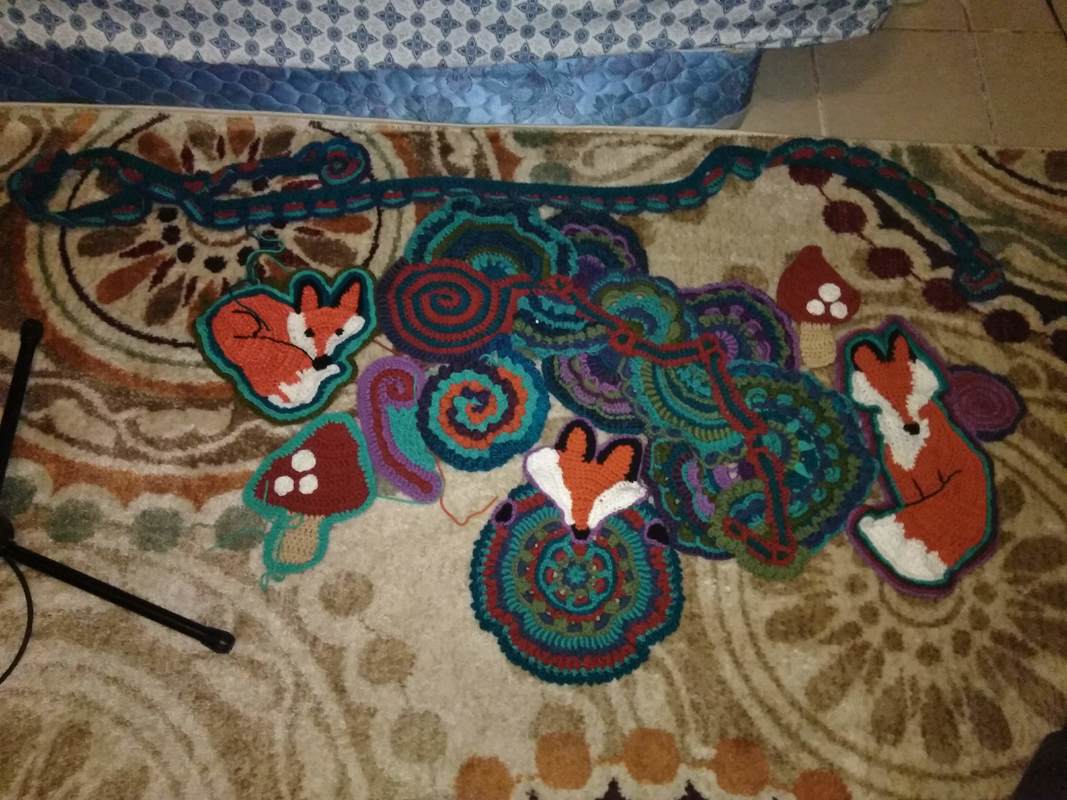
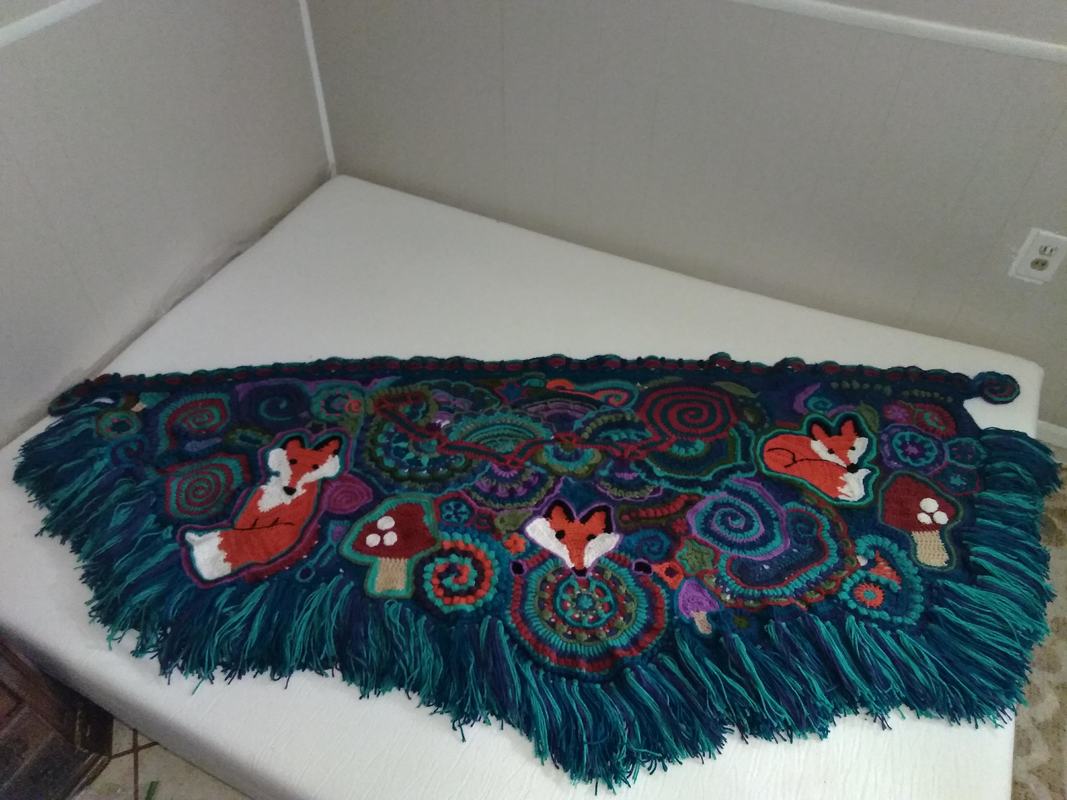
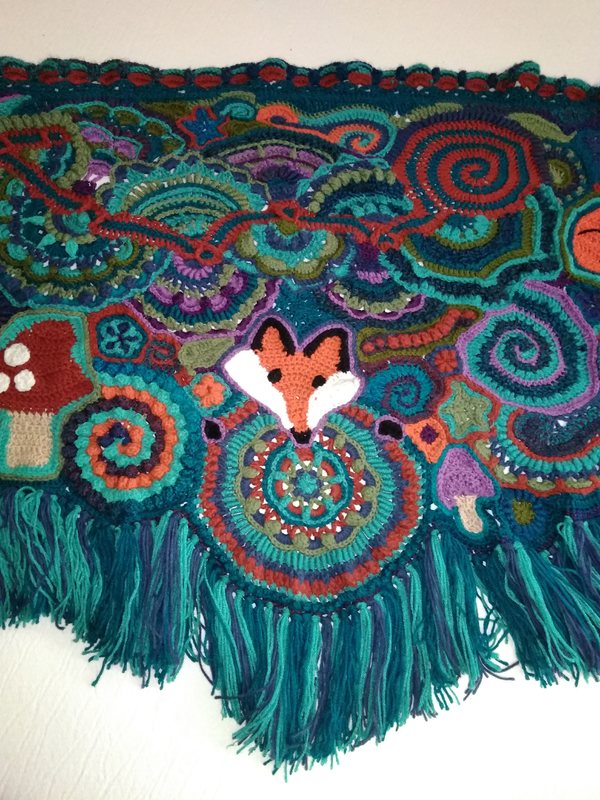
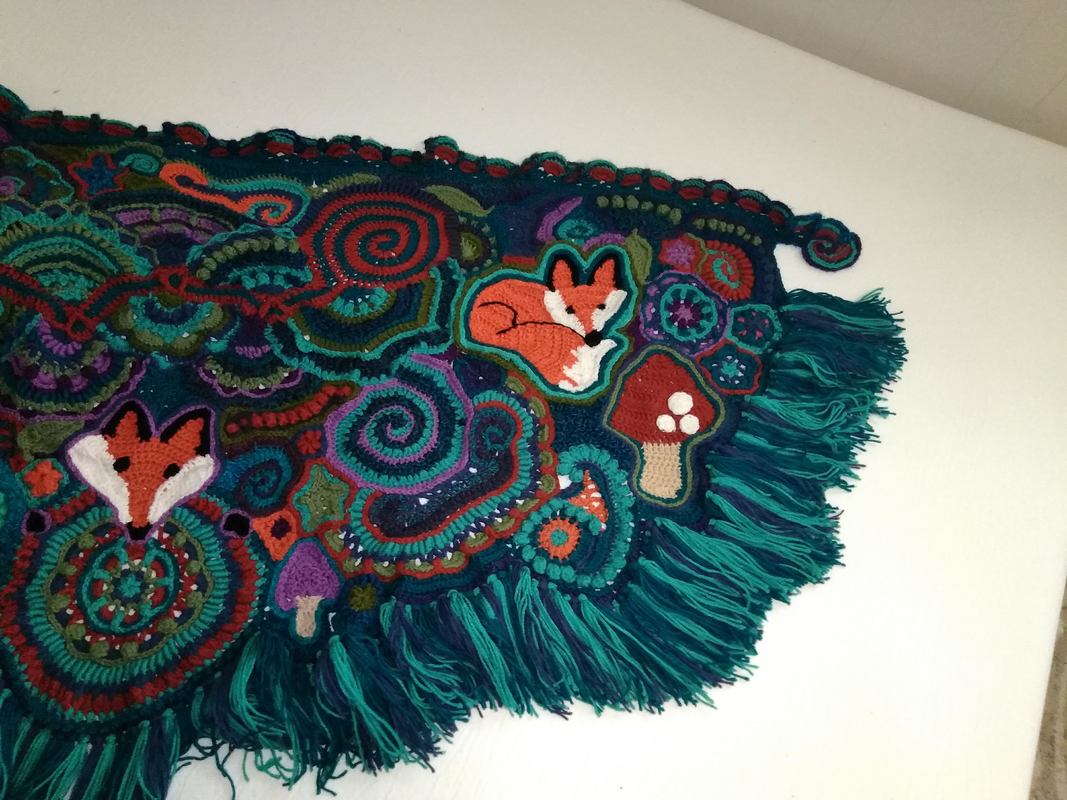
I had a great and terrible time with the creation of this piece. I began the construction before Teal Mushroom Designs was established, so please forgive some of the messy images. I thought that sharing my process could be of use to new free-formers, as I will be going over joining methods, shaping, color selection, etc. At the very least, I hope that this will spread some creative spores! it all started with a little fox...One day I decided to go against all of the rules and go off the grid, so to speak, and try creating an organic image. I started with the face, nose first, and worked my way up and out by any means necessary. To build up the shapes I wanted and not have any gaps or holes I didn't always work "in" the previous stitches. I would work a stitch wherever I could squeeze in my hook, whether it was the side of a stitch, or taking two single strand from two separate stitches. After I completed the head I decided he needed a body. I could just see him curled around himself with his big bushy tail. I drew out the body on a piece of paper and traced the head in the position I wanted it to be in. This gave me an idea of what shapes and sizes I should be focusing on, taking a lot off the guess work out. I made the body as a second piece and then sewed them together with a needle and yarn. I finished him by hand stitching some eyes and defining his hind leg and tail. (I am working on a free-form fox tutorial - Stay tuned!) Another fox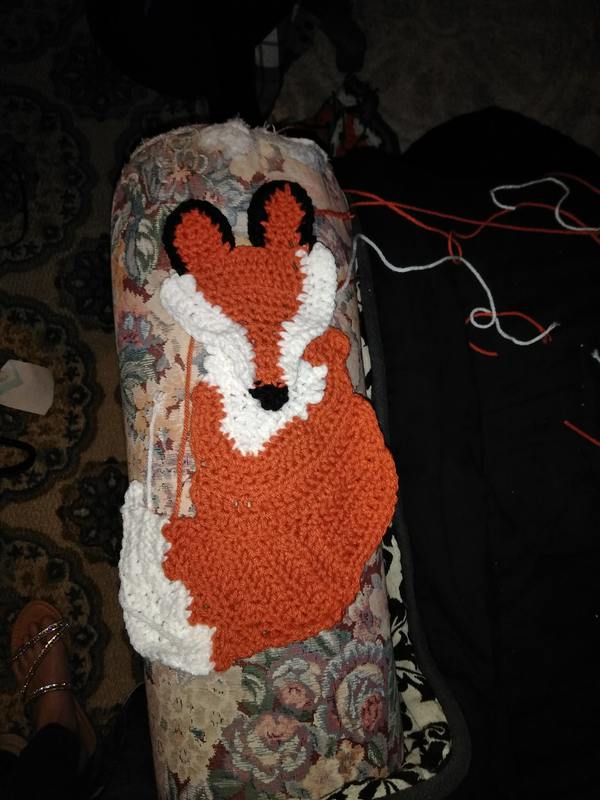 I made a sketch before beginning the construction of my second fox for a general idea of where I was going. Like the previous fox, I started with the nose and worked my way up and out to make the face before constructing the body and sewing them together. I used the sketch as a template and colored it in with yarn by placing my project on top to gauge my progress. (This will make more sense in my upcoming Free-form Fox Tutorial.)  I used the "Hump Stitch" to outline the foxes to:
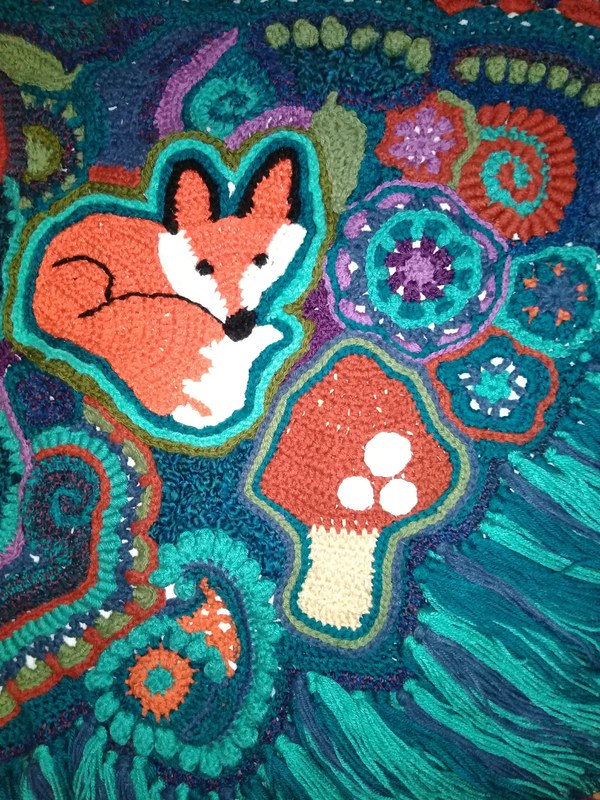
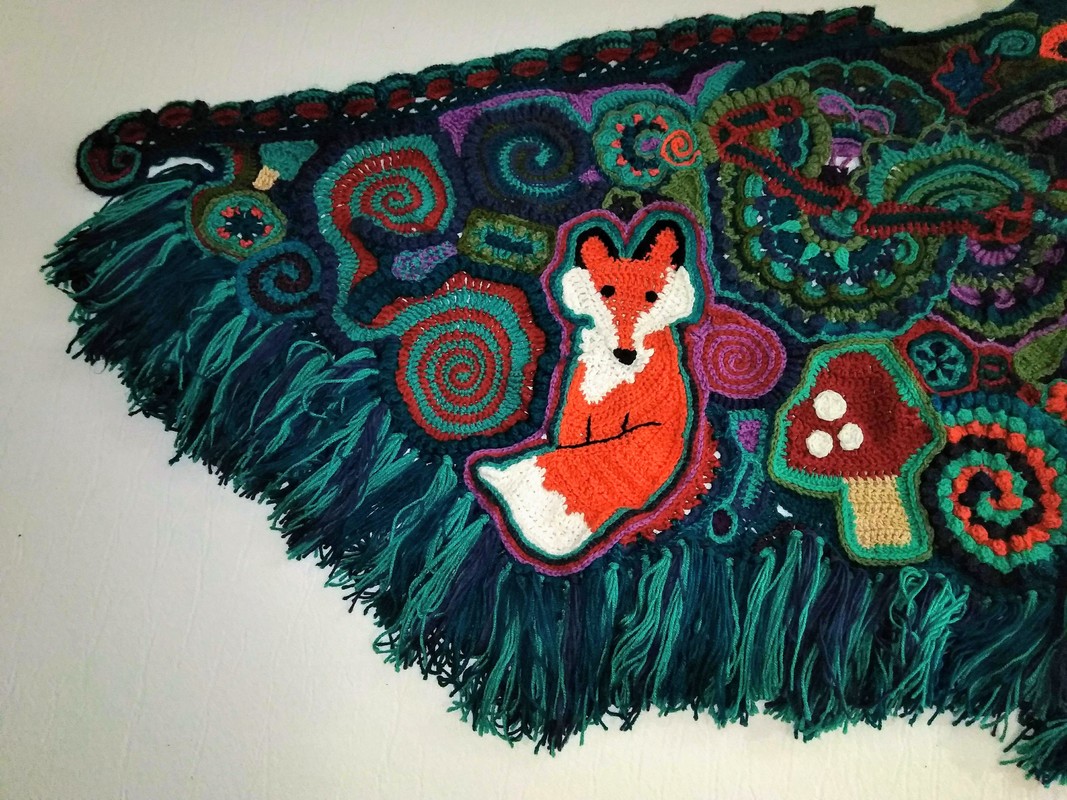
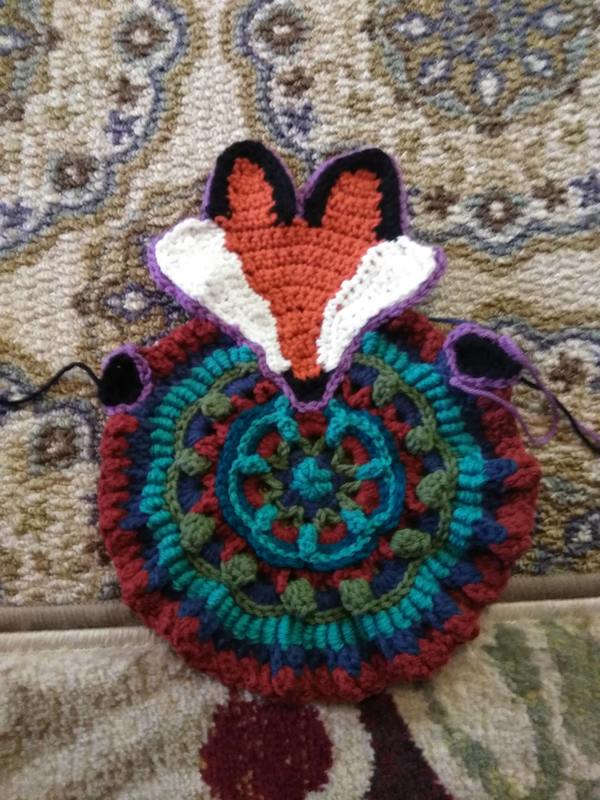
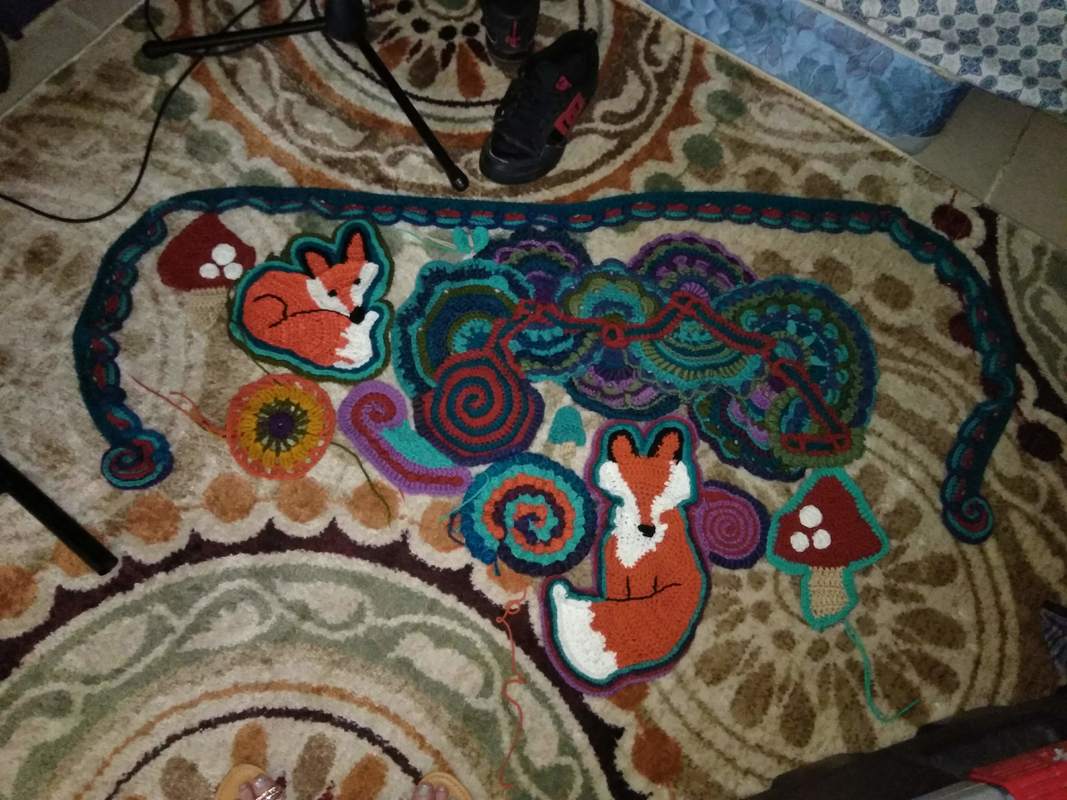
Final Fox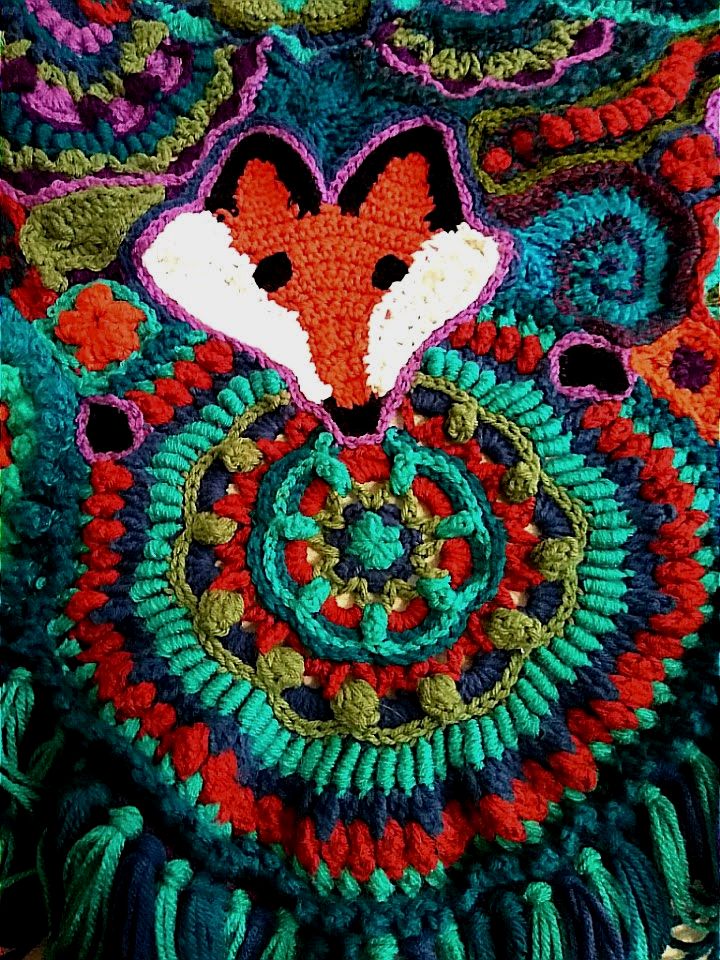 I decided I needed a third fox that would tie the fox and forest theme together with the psychedelic mandala theme. The fox itself is a face and two paws outlines with a contrasting purple to make them stand out. 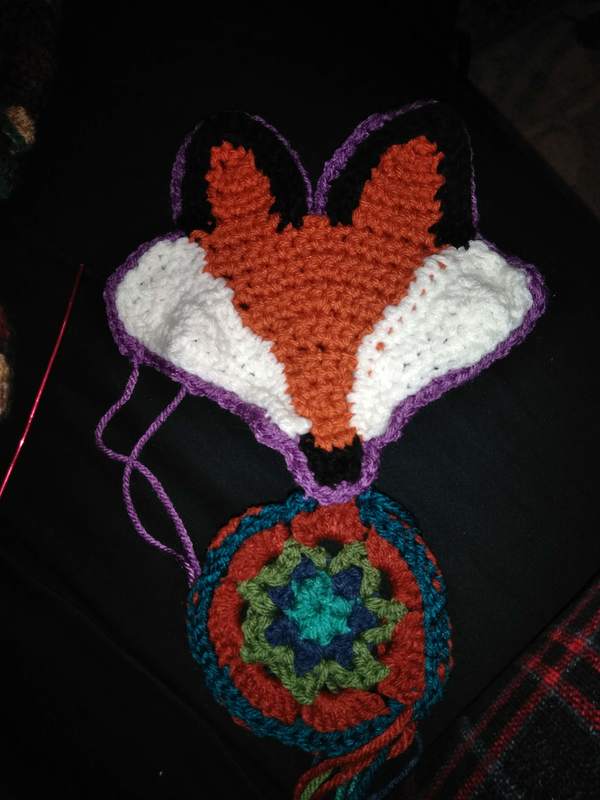 I began the mandala that he is holding as a separate piece and connected it to his nose on the fifth color change. I continued working the mandala around his face, and worked his hands into the motif the same way. I decided to maker the mandala using five colors;
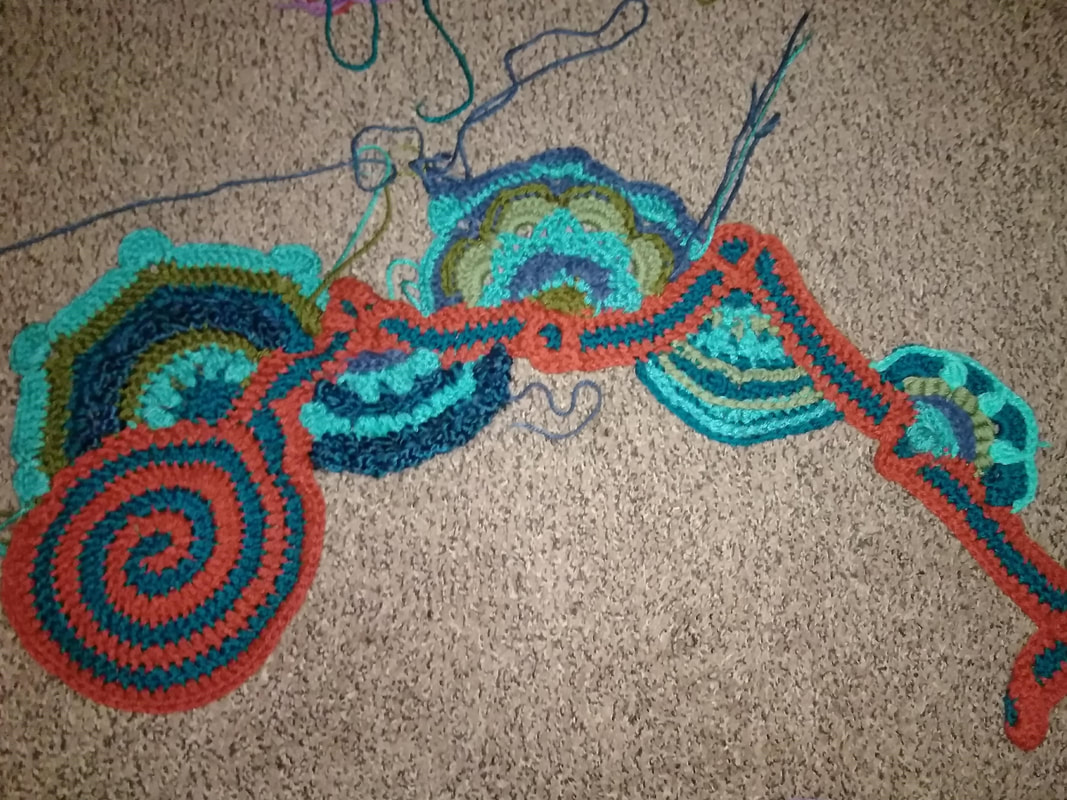
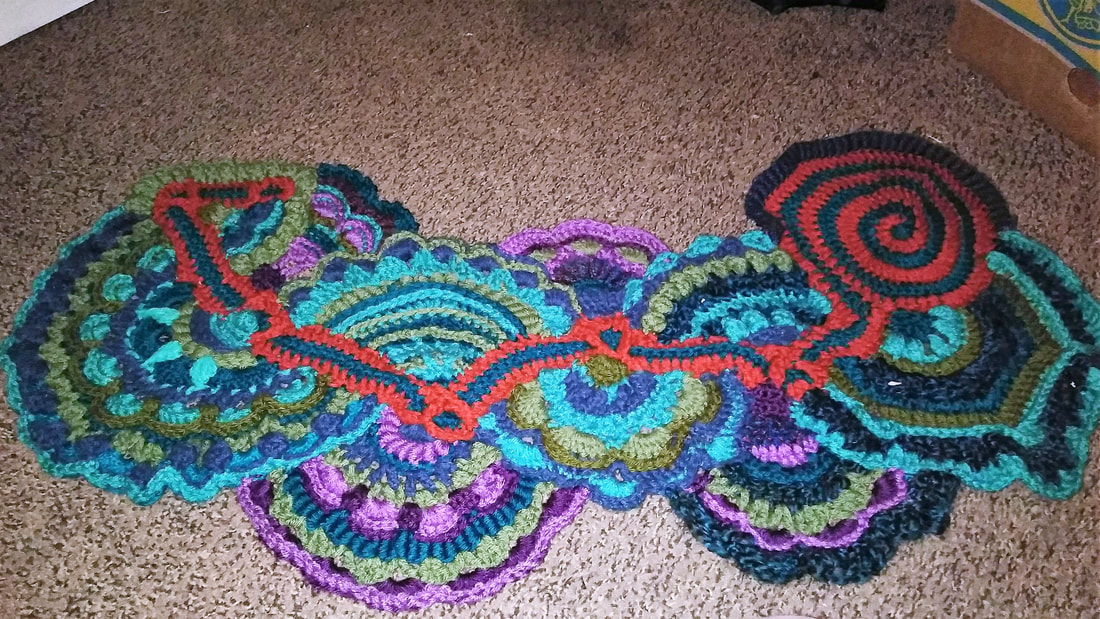
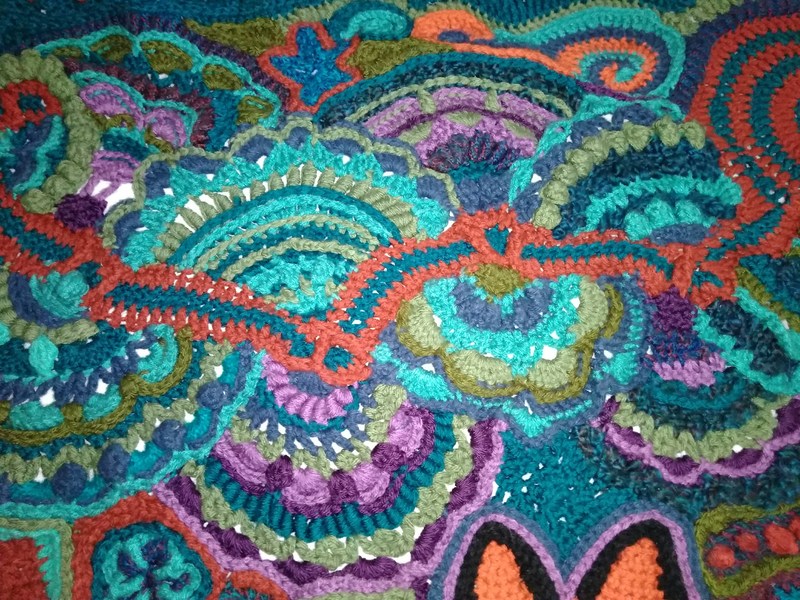
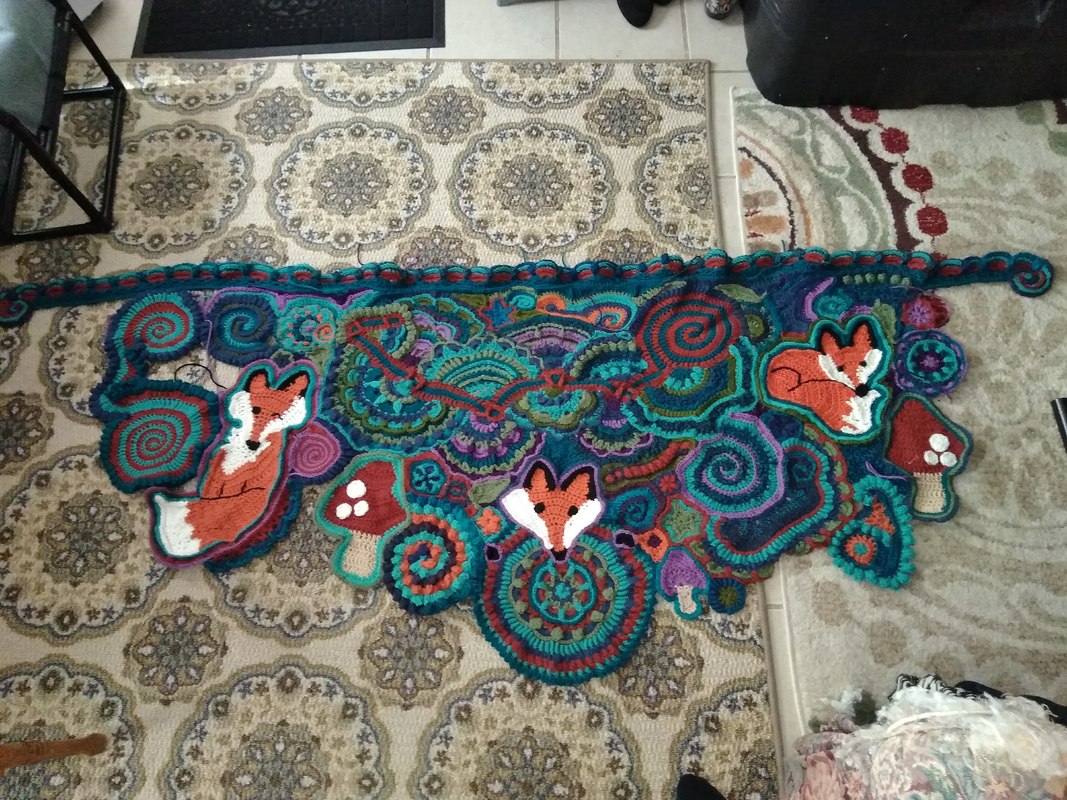
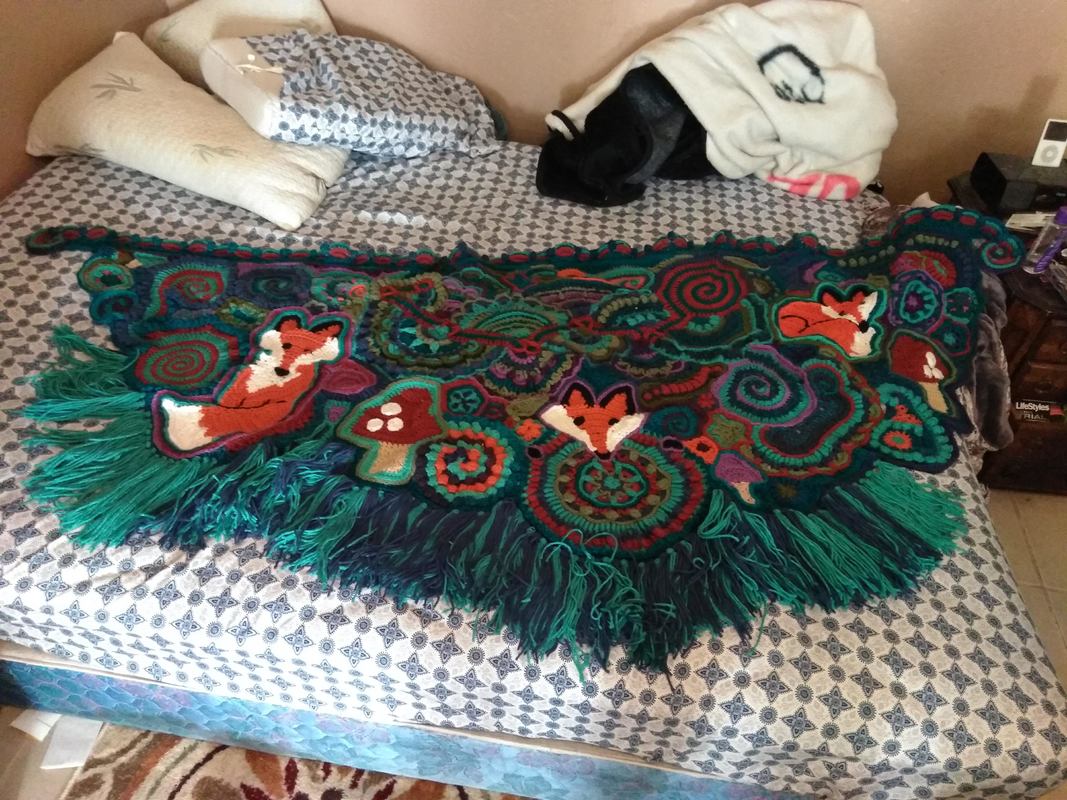
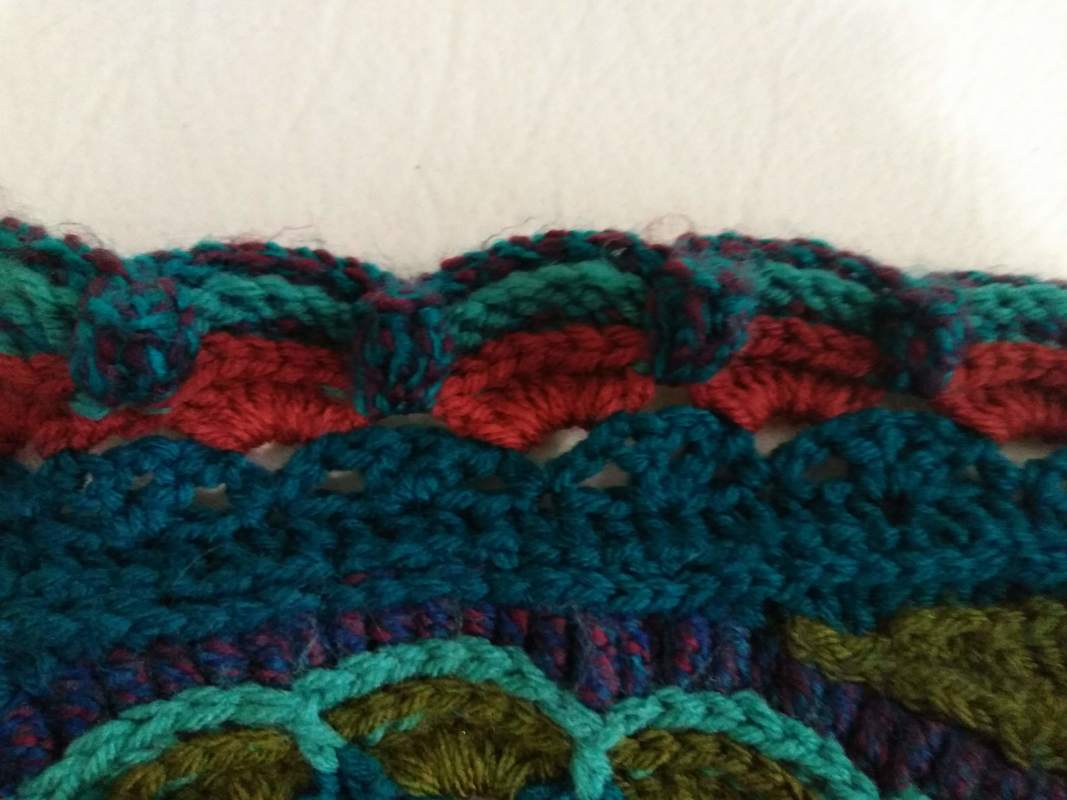
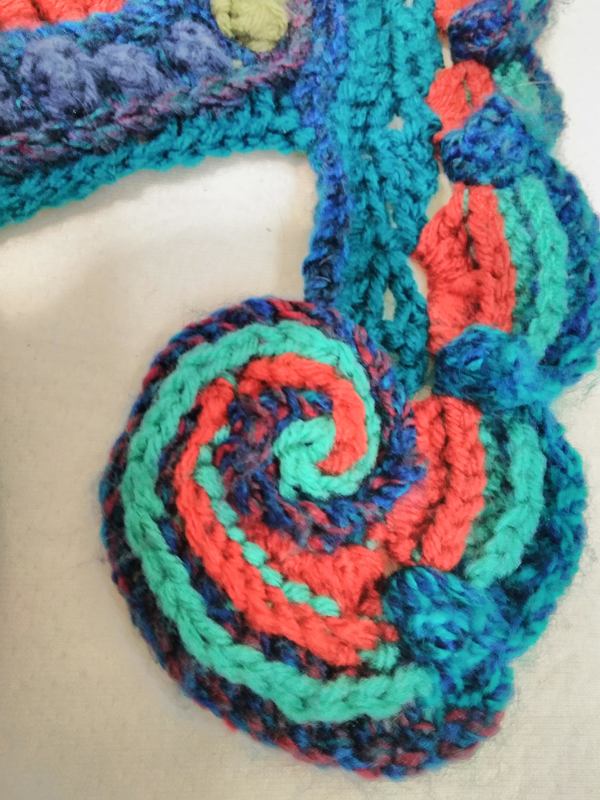
I felt that this provided a lot of color and contrast without becoming muddled and confused. I used a variety of stitch combinations; popcorn's, scallops, bullion's, anything I could think of to make it fun! The Mandala Spiral After completing my foxes I wanted to focus on the psychedelic aspect of my piece. I started by making a large spiral with a long wavy tail. Then I focused on filling in the corners with curved rows of contrasting blues and greens and every stitch combinations in my arsenal to create a mandala effect. I followed that up by including some mandalas in the background. I added a dark and light purple to the background mandalas for definition. Putting it all together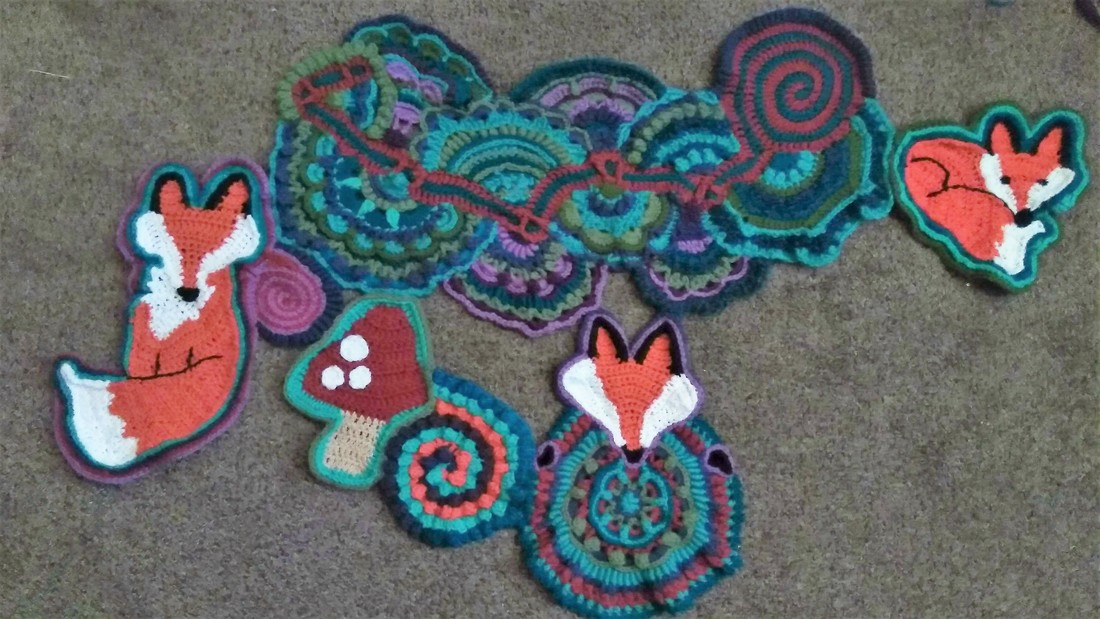 Putting everything together was one of the more difficult parts of this project, simply for the fact that it was hard to commit to anything! I would recommend having some sort of template to go off of, so you can just lay your pieces directly on it. An old shawl, blanket, shirt, etc. will work great - It's just easier if you have something the exact size and shape you are trying to create. I couldn't find anything the size and shape I wanted for this piece, so I just went for it. I connected the the pieces with a needle and yarn when possible, but there were many places where that would have left unsightly gaps. For these areas I used a small hook to connect them, filling in the gaps as I did so. Then I made a separate top border and began attaching the main pieces to it. finishing touchesI used spirals to finish of the ends of the top border. After I had everything sewn together into the shape I wanted I went back and forth along the bottoms and sides to even everything out, before adding a thick, full, luxurious tri-color fringe. completion aka victory!Here are a few more close ups of the completed project! All in all it took about seven months to complete, not including the times that I set it aside for a month or so. I hope that you enjoyed seeing my process! Let me know what you think! ~ Mush Love!  I needed a break from a large project that I've been working on, so I decided to make something on the smaller side. I found inspiration in a tie-dyed ohm top that my fiance gave me, and decided a trivet pad was the way to go! This isn't quite a tutorial, but I wanted to show my process in the hopes that it may help those who are new to the free-form style 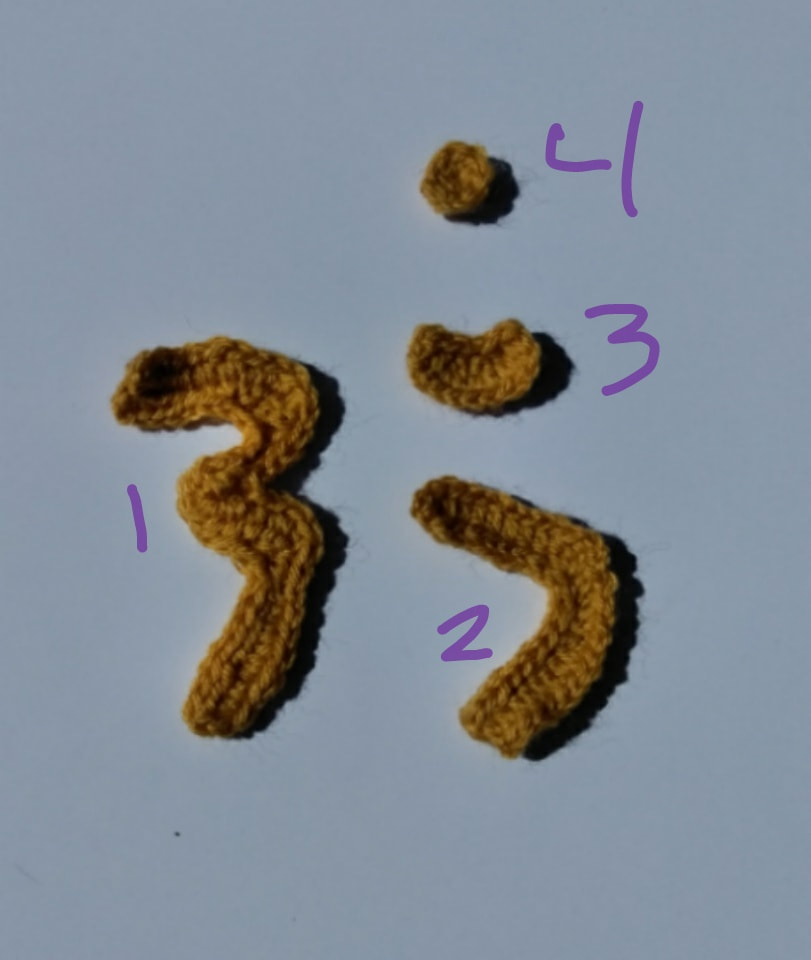 First, I started by making the basic shapes of the Ohm symbol. I made 4 small shapes, which will be attached later on. 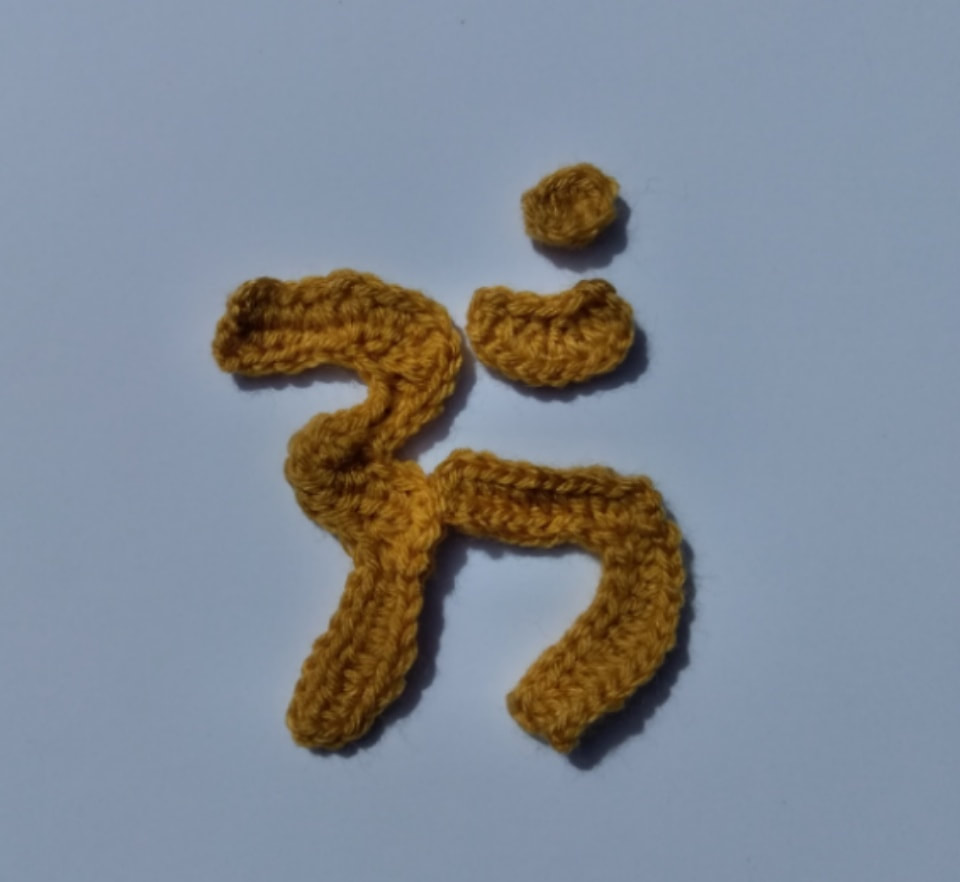 Next I attached pieces 1 and 2 together with a tapestry needle. 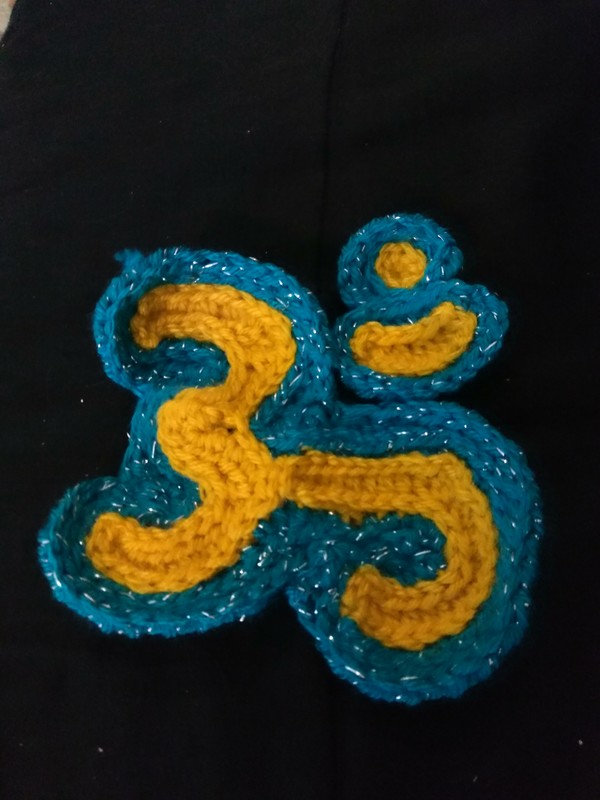 Then I went around everything in blue to make it stand out, and sewed pieces 3 and 4 together. I used a treble for this, except for the bottom of piece 4, where I used a single crochet to decrease the amount of blue space in between pieces 3 and 4. I also used decreases and increases to enhance the curves in pieces 1 and 2.  I followed that up by sewing piece 3/4 to piece 1/2. Now the main piece is complete. This will be the focal point of my potholder. Now all that's left is to make it into a square. I added a spiral to start building the shape I want. 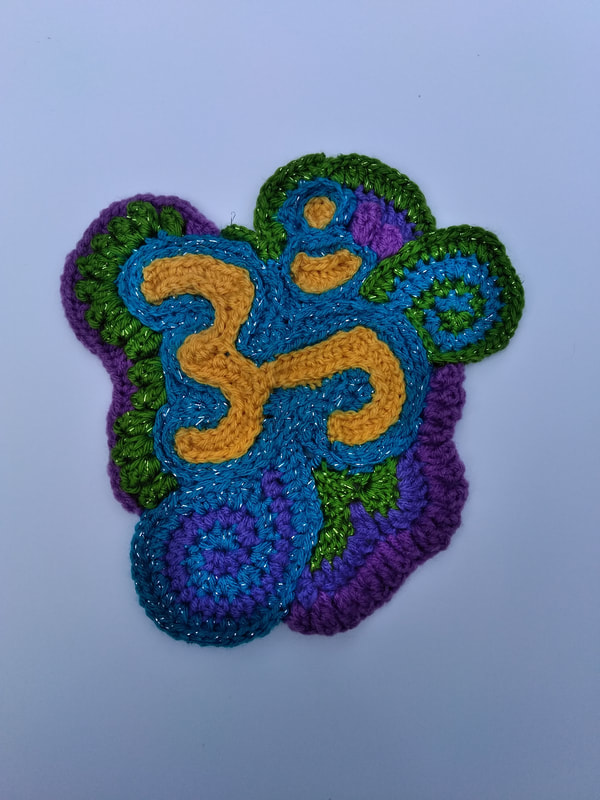 See how nicely it's filling out? I made the spirals separately and sewed them on; everything else is crocheted directly onto the piece. 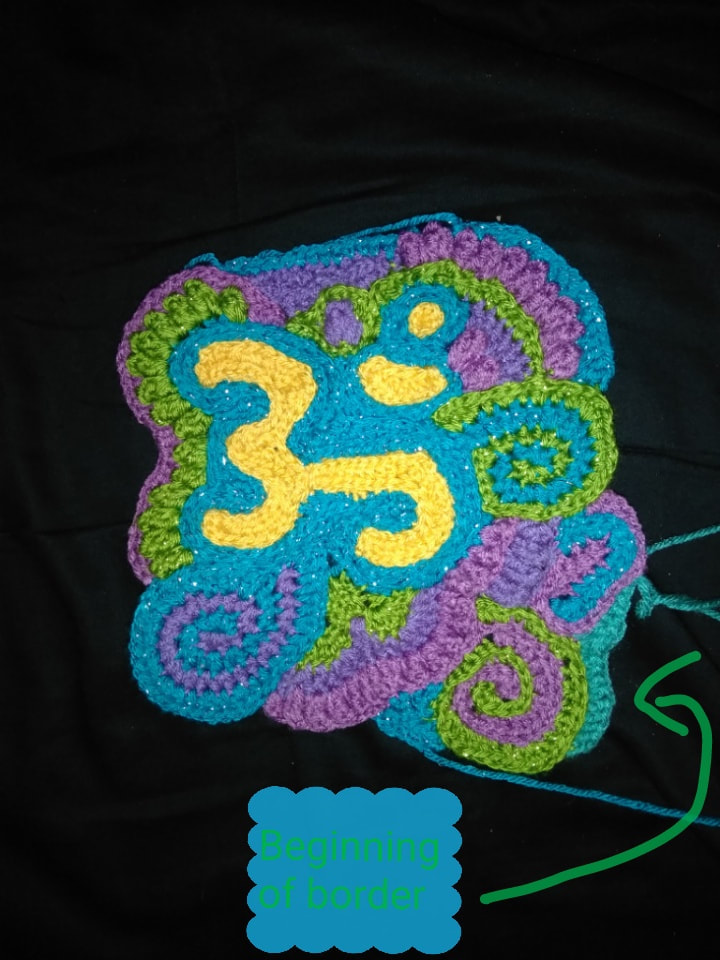 Oops- I forgot to take a picture before I started on the border. I've gotten it relatively square shaped, and am evening everything out just a bit with a teal border. I'm not worrying about making it an exact square because I want to retain some of the quirkiness of the freeform. I'm using a combination of double, half-double, single, and slip stitches for the border - I'm not doing any stitch larger than a double in this piece because it's going to be a potholder; anything larger would make it too open, and risk burning fingers.  Here is the completed front panel. I didn't worry about making it even, or a perfect square because I wanted to retain some of the organic, quirky lines that free-forming creates.  To ensure there are no burned fingers I whipped together a backside for my trivet pad/potholder. I sewed the two sides together with a tapestry needle. To finish it off I added a picot border and a hanging loop, and voila! My reversible trivet pad/potholder is complete! |
AuthorRachel lives in Utah with her fiance and their two cats, Bumeowski and Vick. Archives
January 2019
Categories |


 RSS Feed
