
|
I am so excited to share my latest creation, the Bloody Scarf! This was my first commission piece, requested by the guitarist for the band I'm Alive. He wanted a scarf that looked like his throat had been ripped open and was covered in his blood. I am planning on recreating this as a tutorial in the near future, but for the time being I've thrown together a walk-through of how this was constructed. Getting started...Materials:
I made this in three main sections: two red ends to simulate blood dripping into pools, and a black middle section with splattered with red. I began with the red end pieces using the Holly Berry (although in the future I will do those last, to help control the length of the scarf.), and crocheting vertically (long rows up and down the length of the scarf) using a half double (HDC) stitch. When I wanted to create a drip I would pick a starting point and switch from an HDC to a Chain stitch. When I had chained the desired length of my drip I would turn and continue with the HDC stitch to the end, as depicted below. 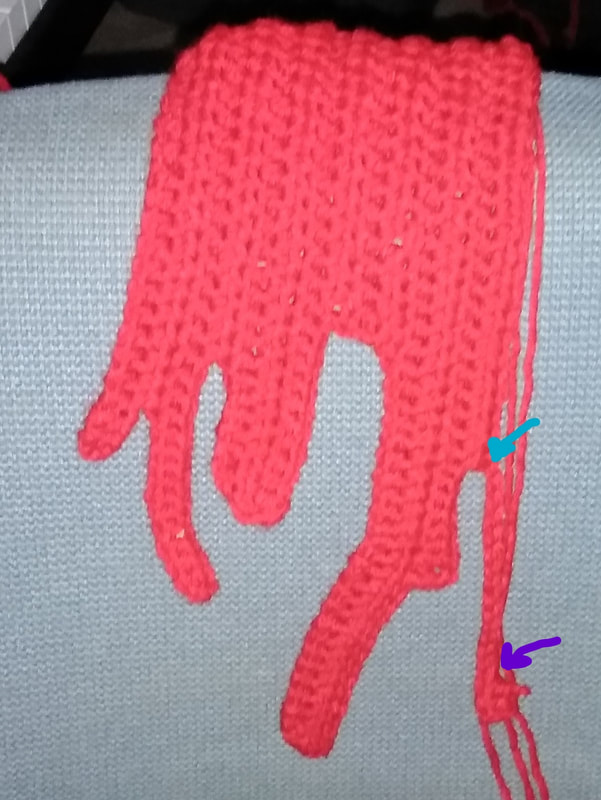 I am creating a new drip by switching from an HDC to a chain stitch, turning when I reached the desired length, and then using a HDC to the end. After I made the scarfs drippy ends I began making bloody drips and splotches. I just combined stitches and stuck my hook wherever necessary to get weird splotchy shapes. The main section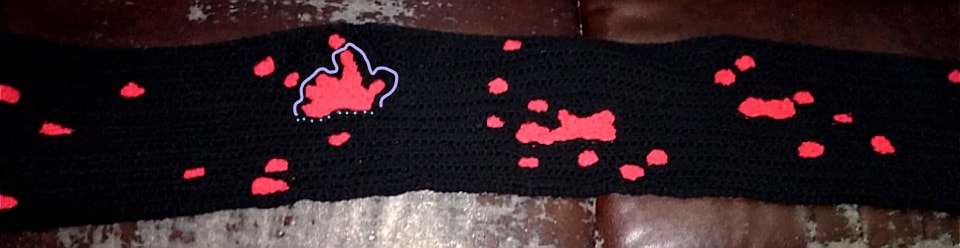 I worked the main section vertically in the HDC stitch, just as I did with the end pieces, only using black yarn this time. I made the same drips on the ends that I did for the two end pieces, being careful to match them up so that I could sew them together like pieces of a puzzle. I sewed the drips and splotches in one side at a time, (shown by the teal dotted line in the above photo) leaving a long tail. Then I switched from a HDC to a Chain stitch, creating a chain just long enough to wrap around your blood splotch, (shown by the purple solid line in the above photo.), then I would continue HDC-ing. After I turn and come back to my blood splotch I would use whatever smaller stitch was best suited to even my row out. It often took more than one turn to even things out. Then I used the long ends I had left to finish sewing the splotches in. CompletionAfter I had my pieces completed and sewn together I did a simple slip stitch border around the entire scarf, throwing in a Single Crochet or Half Double Crochet stitch to even things out if necessary. This was just to make sure that the edges looked nice, and make sure it was even. Ta da! 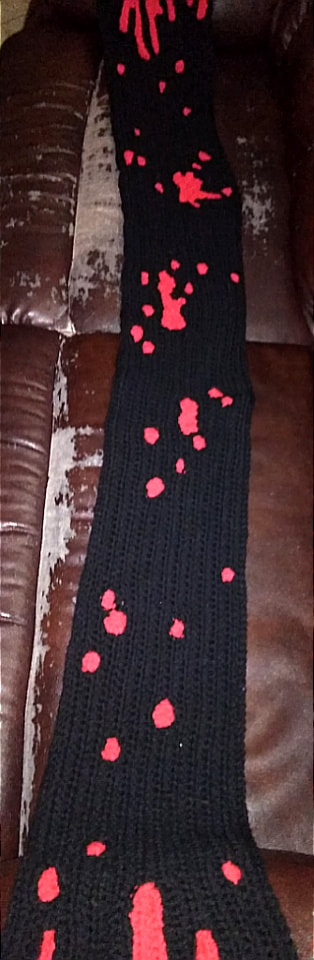
0 Comments
|
AuthorRachel lives in Utah with her fiance and their two cats, Bumeowski and Vick. Archives
January 2019
Categories |


 RSS Feed
