
 I needed a break from a large project that I've been working on, so I decided to make something on the smaller side. I found inspiration in a tie-dyed ohm top that my fiance gave me, and decided a trivet pad was the way to go! This isn't quite a tutorial, but I wanted to show my process in the hopes that it may help those who are new to the free-form style 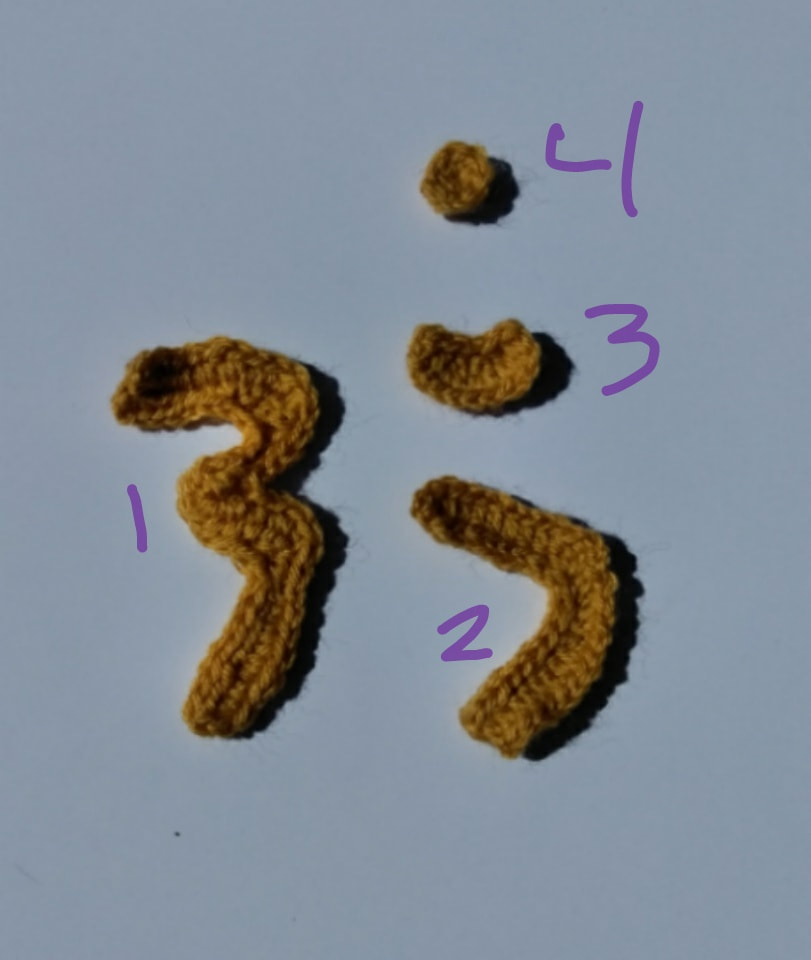 First, I started by making the basic shapes of the Ohm symbol. I made 4 small shapes, which will be attached later on. 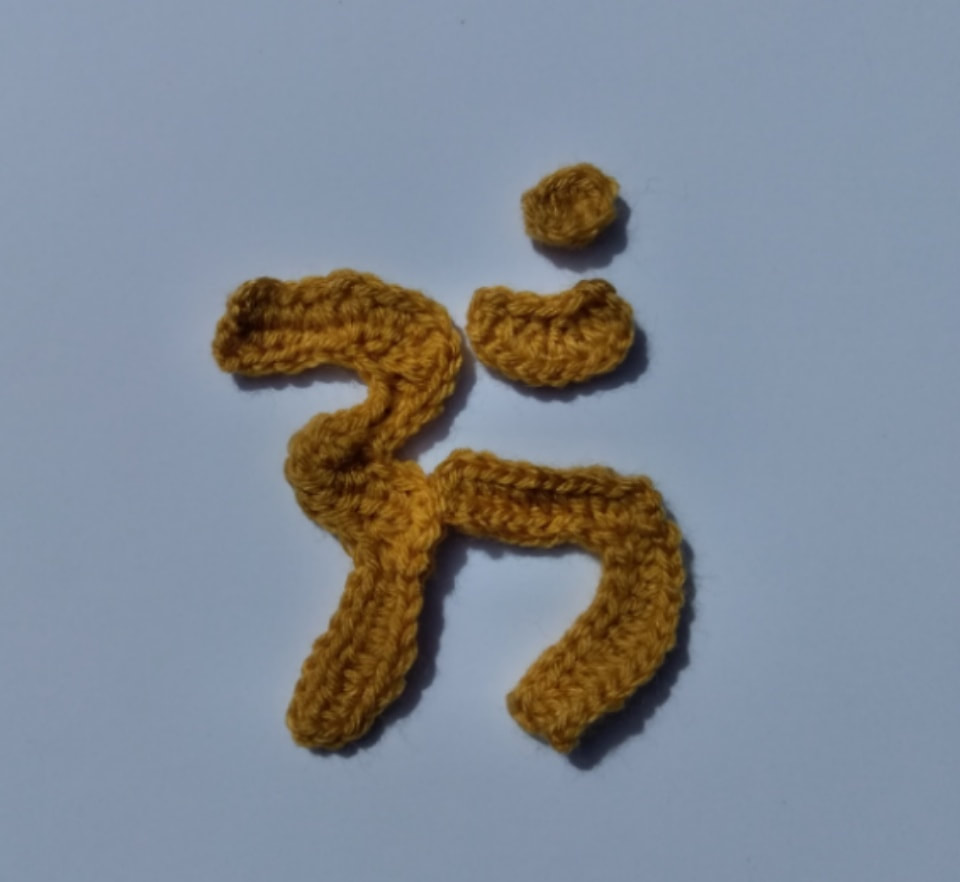 Next I attached pieces 1 and 2 together with a tapestry needle. 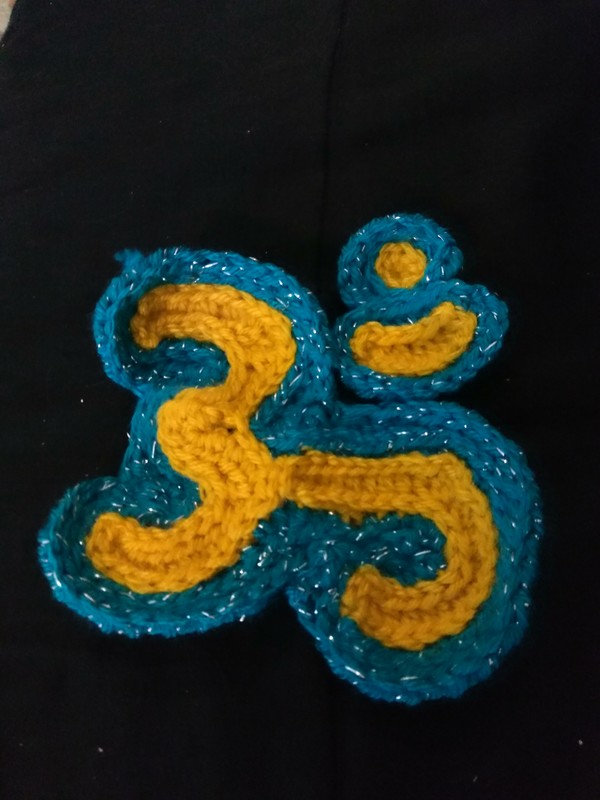 Then I went around everything in blue to make it stand out, and sewed pieces 3 and 4 together. I used a treble for this, except for the bottom of piece 4, where I used a single crochet to decrease the amount of blue space in between pieces 3 and 4. I also used decreases and increases to enhance the curves in pieces 1 and 2.  I followed that up by sewing piece 3/4 to piece 1/2. Now the main piece is complete. This will be the focal point of my potholder. Now all that's left is to make it into a square. I added a spiral to start building the shape I want. 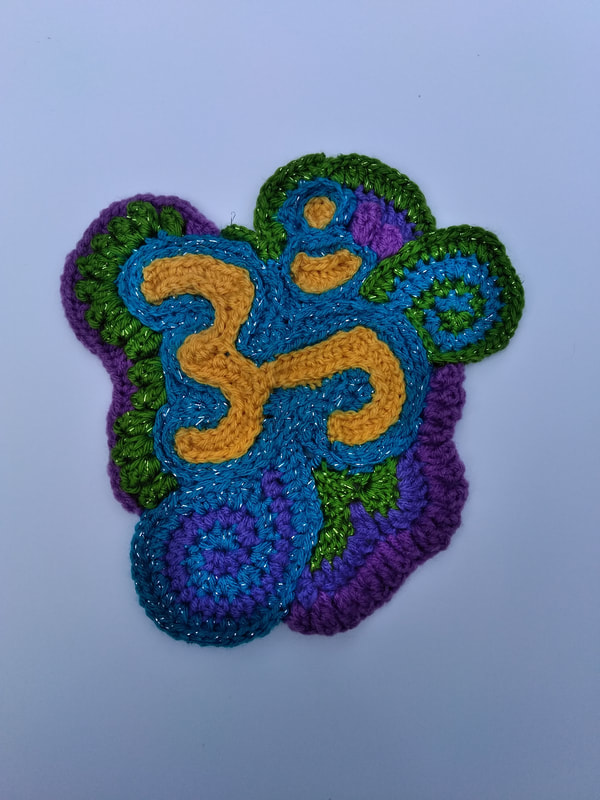 See how nicely it's filling out? I made the spirals separately and sewed them on; everything else is crocheted directly onto the piece. 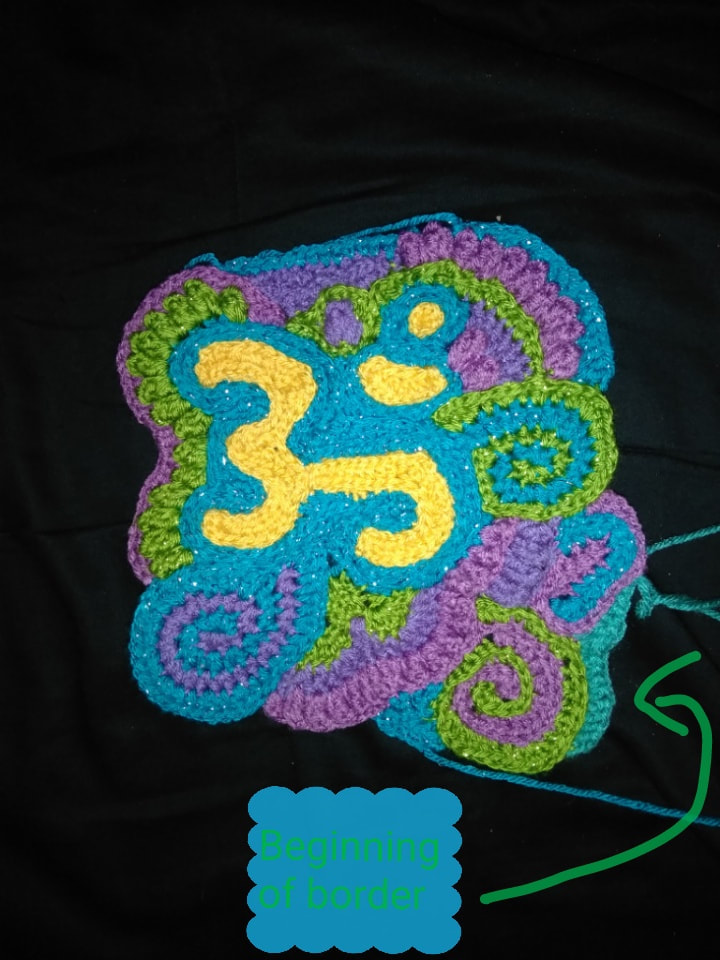 Oops- I forgot to take a picture before I started on the border. I've gotten it relatively square shaped, and am evening everything out just a bit with a teal border. I'm not worrying about making it an exact square because I want to retain some of the quirkiness of the freeform. I'm using a combination of double, half-double, single, and slip stitches for the border - I'm not doing any stitch larger than a double in this piece because it's going to be a potholder; anything larger would make it too open, and risk burning fingers.  Here is the completed front panel. I didn't worry about making it even, or a perfect square because I wanted to retain some of the organic, quirky lines that free-forming creates.  To ensure there are no burned fingers I whipped together a backside for my trivet pad/potholder. I sewed the two sides together with a tapestry needle. To finish it off I added a picot border and a hanging loop, and voila! My reversible trivet pad/potholder is complete!
0 Comments
|
AuthorRachel lives in Utah with her fiance and their two cats, Bumeowski and Vick. Archives
January 2019
Categories |


 RSS Feed
